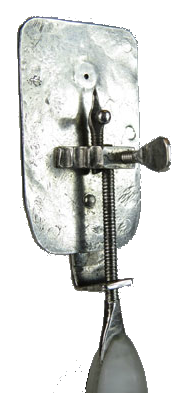
The mount
Phase II - Preparing the mount
File stepped side into mount (stage)
The mount was a tiny block of silver. None of them has been measured exactly, but each is narrower than its body plate, no more than 20 mm long (less than 1 inch), maybe 7 or 8 mm high, and 4 or 5 mm thick. The mount on the 167x silver is tapered; it has a triangle for a cross-section, the triangle pointing toward the plate. The others are rectilinear, like the close-up on the upper right (click to enlarge) for the 248x silver microscope below. That's the positioning screw coming in from the right and the focusing screw out of focus. The file and hammer marks are visible.
Leeuwenhoek used a file to make the stepped pattern on the lower right (click to enlarge). It seems to serve no purpose. The pattern is slightly different on the mount of each surviving microscope. It's not often that we think of Leeuwenhoek and aesthetics together. This may be the only decorative feature in an otherwise completely utilitarian design.
Drill and tap three threaded holes into the mount
This method for making screw holes was well established in Leeuwenhoek's time. While the width of the drill and the thread of the tap were perhaps arbitrary, every threaded hole that Leeuwenhoek made with that drill and tap would be the same size.
Each mount needed three holes: one for the positioning screw, one for the focusing screw, and one for the specimen pin. The close-up on the lower right shows the positioning screw going into the mount. Note that the threaded hole in the mount has cleanly filed edges and that the edges of the mount itself show some rounding, that is, more filing.
While Leeuwenhoek may have made his own smithing tools -- hammers, chisels, files, tongs, anvils, clamps, vises, drills, taps, and dies -- he may well have purchased them from a Delft blacksmith or silversmith. The taps and dies had to be of stronger metal than they were carving threads into, so they were probably iron or steel.
The eleven surviving microscopes all have a different pitch to the thread of the main positioning screw, suggesting that Leeuwenhoek used different taps and dies for each.
It is curious that while the lenses of Leeuwenhoek's microscopes have been thoroughly analyzed, the metal parts have not. For example, none of the other screws seems to have been measured either for pitch or diameter. Van Zuylen studied nine of the lenses in the early 1980's and the tenth a decade or so later. However, he took only two measurements of the metal parts, the outer dimensions of the body plates and the pitch of the main screw. The captions to the images in Beads of Glass add the width of the lens holes.
This missing data would help us understand more about Leeuwenhoek's working methods.
 |
 |
 |


